THE IDEA
A calm, clean edge – without adding another profile.
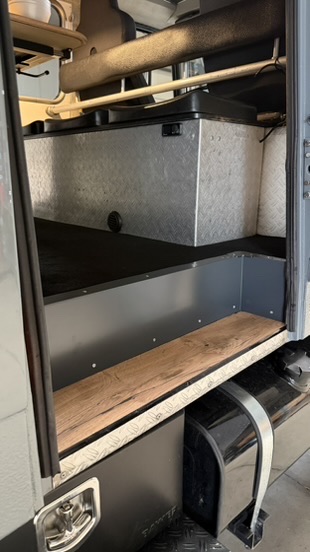
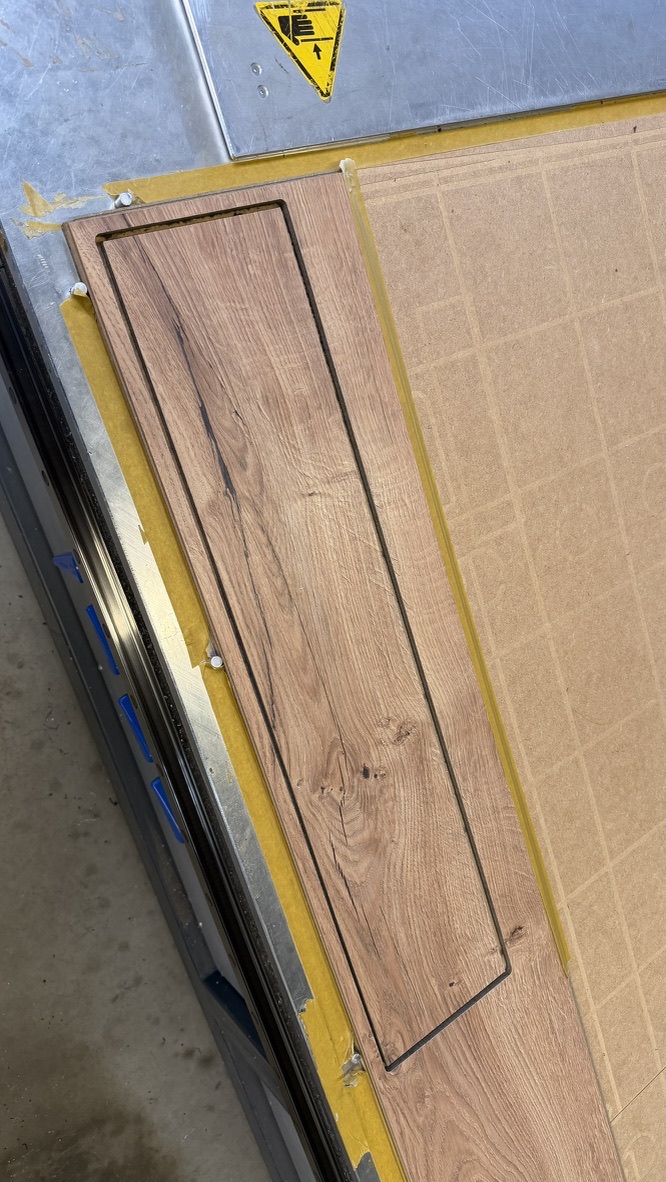
The sides of the existing step were already insulated with 6 mm Armaflex, while felt covered the top. For the finished build, the lower tread was to receive a durable surface made from 6 mm flooring laminate. The vertical faces and upper edge would be formed from 3 mm matt-grey Dibond.
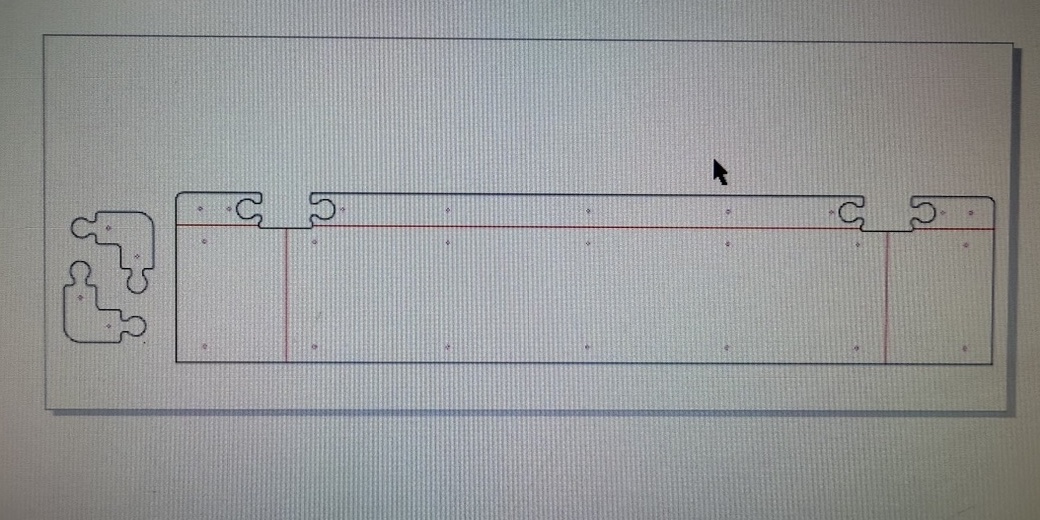
An extra angle profile on the visible edge would have simplified the job, but it would also have added another material break. Instead, the trim was developed as one largely continuous flat pattern – with a 40 mm top flange, two opposing folds and a corner joint where the same area of material cannot exist twice in the flat sheet.
THE TEST CUT
Test first. Then machine the final part.
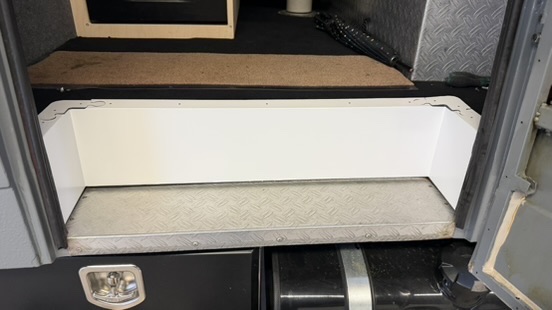
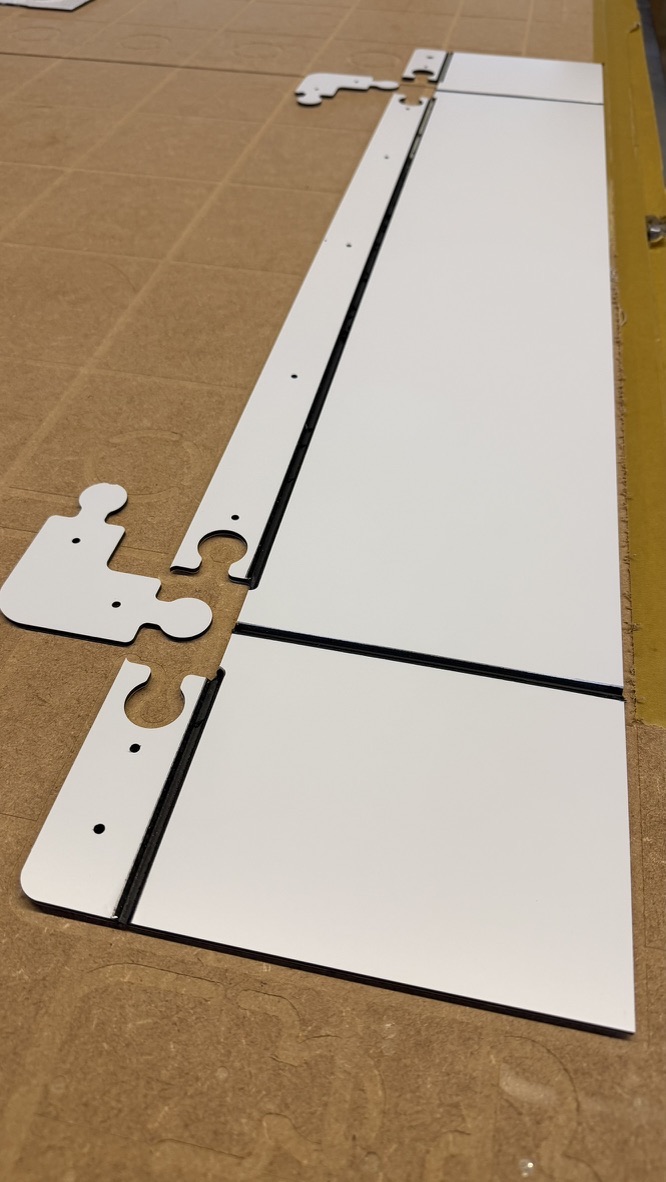
Before the final matt-grey sheet went onto the router, the complete geometry was made as a prototype. Only in the vehicle could we judge whether the 170 mm-high trim fitted, the 40 mm flange sat cleanly and the rounded ends cleared everything around them.
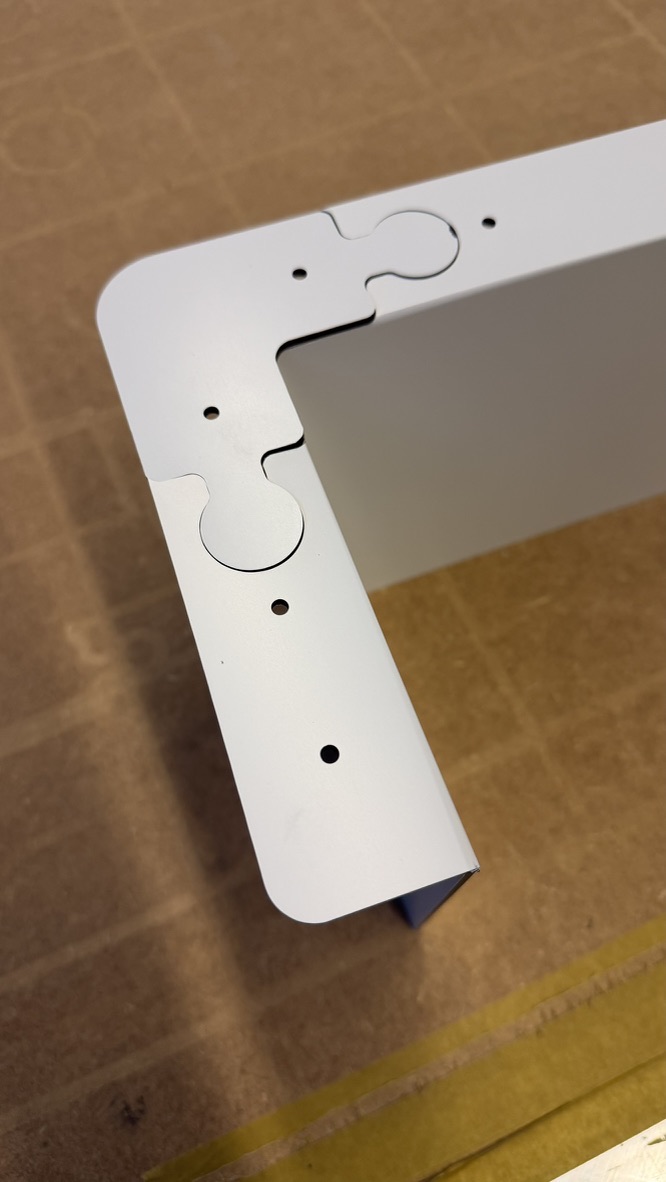
The test also revealed two details to refine: the tabs of the puzzle joints needed softer radii, and the corner pieces required a little more clearance for the 3 mm sheet. That was exactly the purpose of the white prototype.
Designed flat.
Then folded.
The challenge was not just the cut, but the sequence: the complete Dibond flat pattern had to be machined in one setup and from one side only. Afterwards, one groove opens while the other closes during folding. The white prototype resolved the final fractions of a millimetre before the matt-grey sheet followed.
THE TRICK
Two folds. One machining side.
Normally, opposing folds would be machined from different sides. This part, however, had to remain in one setup. Both grooves were therefore cut from the same side even though they later behave differently: one fold opens, while the other closes.
Where they cross, the sheet cannot form the missing corner piece by itself. That is where the puzzle comes in.
- 01Machine it flat
Contour, grooves and holes are produced in a single setup.
- 02Fold in opposite directions
One groove opens while the other closes in the opposite direction.
- 03Fit the corner piece
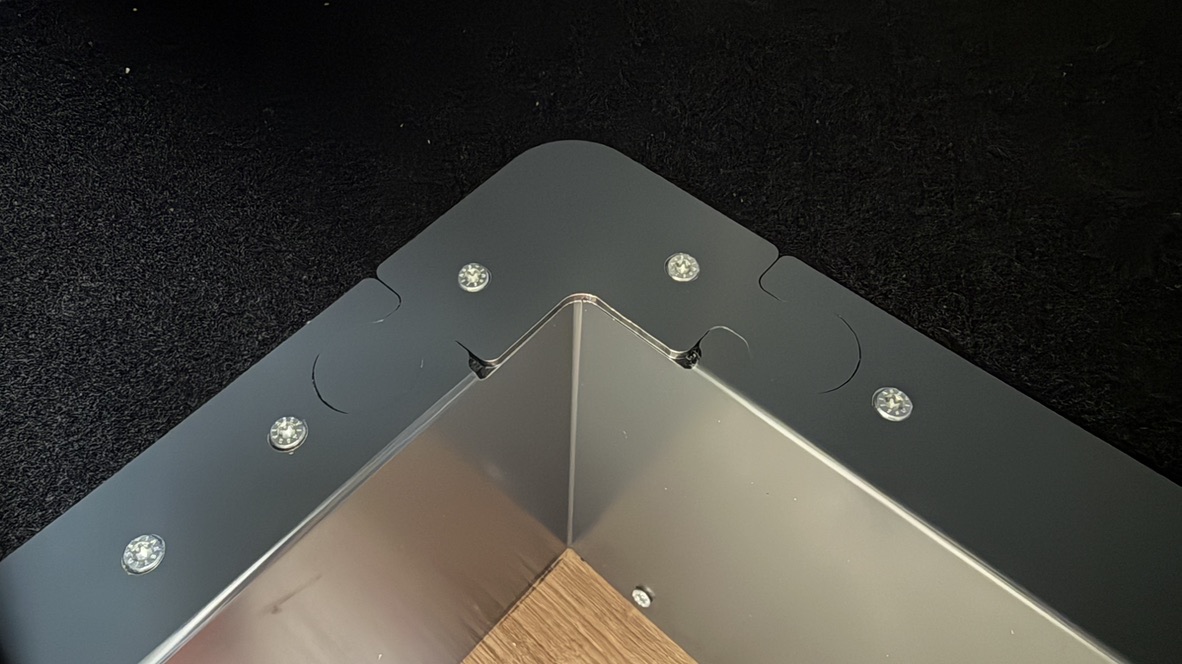
The puzzle insert joins the two flanges where they would need the same area of material in the flat pattern.
- 04Screw it together cleanly
The joint remains deliberately visible – but no extra angle profile interrupts the edge.
THE MISSING PIECE
The puzzle is not decoration. It solves the corner.
The small inserts fill exactly the areas left open by the opposing folds. Their shape makes the solution understandable instead of hiding the joint behind an angle profile.
Several flat-machined parts become one calm, continuous surround – and a construction problem becomes a detail that is allowed to remain visible.
“When material is missing in exactly the right place, another profile does not always have to cover it. Sometimes you simply need the right piece.”
THE RESULT
Wood above. Calm grey along the edge.
The new step now fits naturally into the double cab. The laminate provides a durable, easy-to-clean surface. Matt-grey Dibond frames it neatly without an additional angle profile interrupting the front edge.
The small puzzle remains as a visible reminder that the most interesting solution often appears exactly where a piece of material seems to be missing.
All build projects ↗